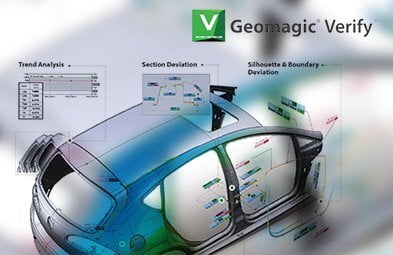
3D Quality Control And Reporting
What is a 3D Quality Control?
3D Quality Control evaluates industrially manufactured parts in detailed measures using 3D Quality Control Systems. In the process, the object’s data is displayed and analyzed in 3D form using CAD. Significantly during the pre-production stage of the manufacturing life cycle, this method can effectively optimize the final product.
How to do a 3D Quality Control?
Our experienced engineers are doing 3-Dimensional Quality Control with different 3D scanning equipment. Camera-based scanning can be defined as digitizing millions of points as a light source is projected onto the object. The 3D scanning camera takes photographs with the reflected light that can be transferred into 3-dimensional data. The resulting digital data, called a point cloud, can be given as polygon data. This data can be processed using 3-dimensional coordinate measuring systems (CMM: Coordinate Measuring Machine); the point cloud visualizes the external surface of the scanned object. Since we are the Link to the Future, we go one step further and provide our customers with internal parts details with XRAY CT technologies. For both methods, commonly used data formats are STL, OBJ, PLY, WRL and more.
The created point cloud map is cross-examined through various methods (e.g. Best-fit, RPS, 3-2-1, …), then all the differences are observed. The most common methods for this are:
- Creation of a surface deviation map.
- The physical method is by marking specific points.
- The appliance of 3D GD&T.
- The appliance of 2D GD&T.
- Measuring via a cross-section.
- Checking of the trim lines.
- Measuring of body thickness.
- Volume calculation.
- Surface calculation.
- Checking of silhouette deviation.
- Automatic reporting.
Quality Control Result

Types of 3D Quality Control
There are many different ways of 3-Dimensional Quality Control. Our experienced engineers know all of the professional types:
- Preliminary sample measuring (PPAP, FAI).
- Pre-mass production measuring.
- Template deformation measuring.
- Chipped production measuring.
- Analysis of competing products.
- Measuring backward spring in steel parts.
- Measuring finish allowance in cast iron parts.
You can follow the links below for various additional applications:
Advantages of 3-Dimensional Quality Control
Special lenses and light sources power our certified 3D scanning method. Therefore, it has various advantages compared to conventional quality control methods.
- More precise data than traditional quality control applications.
- Instead of recording one specific aspect, 3D scanning systems record the complete data of an object.
- The resulting data can be directly translated into the engineering phase of a project.
- The scanning process can be automatically repeated for another part in the same production series.
Essential Factors to Consider in 3-Dimensional Quality Control:
- Digitization systems are developing day by day. Therefore, it is fundamental to stay up to date with the newest technologies
- High sensitivity in comparison with all non-3D measurement systems.
- The sensitivity of measuring equipment should be higher than general tolerances of any given part that is being measured.
- Measuring equipment should have the certificate of measurements.
- Different technologies can be more suitable for the part being measured.
- Depending on the amount of production, more than one part should be measured for pre-mass production or sampling measurements.


